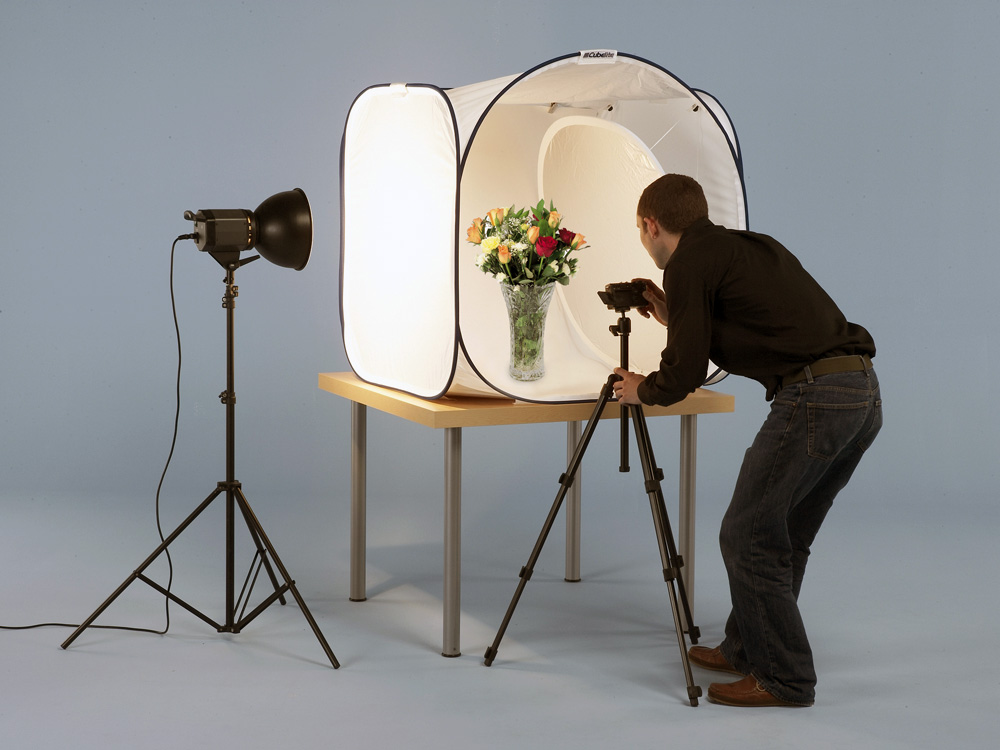
A visual presentation is your key to success in ecommerce. Customers will take a decision about the product and the whole brand according to its photos, so you should show your best.
Professional photography for all products aren’t cheap for beginners in ecommerce, so DIY product image can be your solution. We prepared a detailed guide that will help you to make existing product photos even you never did it before.
Contents
What do you need to create an amazing DIY product image:
- Camera;
- Tripod;
- White background;
- White bounce cards;
- Table;
- Tape;
- Room with proper light.
With these simple tools you can increase your conversion and look more presentable on ecommerce platforms, where your photos will be near photos of your competitors, as Amazon does.
You shouldn’t spend a lot of money on additional professional equipment such as camera flash or light, or special courses, just a little experience. To make a DIY product image with high quality are not so complicated. So, let’s consider it step by step.
#1. Camera
If you have a budget you can choose a powerful camera and additional lens. You can consult with professional photographers or search for recommendations on how to choose the camera for DIY photography on the Internet. If you planning to take photos with the help of your smartphone, it’s also ok, don’t despair, but as soon as possible buy the camera.
#2. Tripod
You shouldn’t spend a lot of money on the tripod, you can find something interesting up to $30. You need to set up your camera on a small aperture that will give you the opportunity to get extra depth of field for better images.
To make good photos you need a slow shutter that leads to a more quantity of light. You can’t hold the slow shatter of the camera in your hand: it allows the rick that your product on the photo will be blurred. So, it is a reason to buy a tripod.
#3. White background
You can search for a white sweep or even paper sweep if you need to make a lot of photos. Paper sweep can be more practical: when it gets dirty you can just cut off this part. Also, you can use a life hack: look for a poster board in the art store. It is simpler to search for a clear white background for your photos. If you want something original, for example, ivory or beige background it can be difficult to find in stores.
#4. White bounce cards
When you use natural light from the window for your photos, you will get a bright part and dark part with the product’s shadow. To reflect the light and get a balance you need something white, for example, white foam board as your bounce card.
If you need to make deep shadows for your white product on a white background you need to use black bounce cards. Add such cards on each side of your working zone (they shouldn’t be visible on the ready photo). You can use a combination of white cards in front of the object and black card behind the photo for a more interesting lighting setup.
As in case of searching for the product background you can use poster boards from your nearest art store.
#5. Table
You need a standard table that will be wide enough for your products. For example, it can be folding one in white color.
#6. Tape or clamps
You need special tape or clamps to set up your background and bounce cards on your table.
#7. Room with the lightning
It will be perfect if you have a room with a large window next to the wall. If the window is large enough you will get more natural lighting. When your table stands near to the window you will get soft lightning with dark shadows. In case when the table stands further from the window you will work with smooth light and sharp shadows. You also can use your garage with an open door instead of a room with a window.
DIY photo guide:
We created a step by step guide for your first product photo session:
- Prepare the table;
- Prepare the setting;
- Set up your camera;
- Put your product in the middle of the table;
- Set up the bounce card
- Make photos, estimate and choose the right ones;
- Retouch photos;
- Optimization images for online stores.
Let’s consider in detail how it can look like.
#1. Prepare the table
You need to set up your table near the window and try to not intersect the shadow from windowsill. For example, your table can stand at the right angle to the window or at a 45-degree angle. Also, you can try to take photos in front of the window (it is especially good for food pictures).
Turn off all other light sources in the room, you need just natural light from the window to make clear photos. Other extreme, you don’t need direct sunlight on your products.
#2. Prepare the setting
You need to create a vertically oriented composition for your photo, so think about it when you will create the setting. For example, if you have a wall you can glue the background to the wall and table. If you haven’t the wall, you can use bricks, boards, or other facilities.
Leave the place for the bounce card too.
#3. Set up your camera
At this stage all depends on your camera: it can be completely automatic or with the ability of customization. The automatic mode also works well with our prepared lightning.
If your camera need allows different modes you should do several things:
- Set up the white balance (WB) in auto mode (AWB);
- Turn off your flash setting;
- Set up the most high quality of the picture (RAW, if your camera has it, if there is no RAW, you can choose the biggest JPG parameter). If your camera offers two different settings for size and quality you should use the biggest size and the superfine quality. Also, you need the lowest level of noise (ISO 100).
Then it’s time to set up your exposure.
Use manual mode
It is the best variation for photos. You need a mode with the depth of field, so change f/stop on the biggest number. Turn your shutter and customize the dial to make your picture bright.
Doing so, you will see that your shutter number gets smaller. It means that it gets more light.
Use aperture priority
This feature may not be available in your camera, but if you get it, customize the biggest number for f/stop.
Auto exposure
If you have just examples of photos in your camera modes, choose something like sunset. If you make your photos with the help of the iPhone just tap the needed area for customization.
Zoom
If you can choose between optical and digital zoom, choose an optical variant, it will get better quality of pictures. Digital zoom is just cutting your picture. Long optical zoom can remove distortions that give a wide-angle lens.
#4. Put your product in the middle of the table
You should be sure that the product stands in the perfect position and its label is at the center of the lens of the camera.
#5. Set up the bounce card
You can try different positions and angles to set up the bounce card to get better results. It will modify the light and shadow in your studio.
#6. Make photos, estimate and choose the right ones
You need to get experience to make good photos, it all depends on time. So, make experiments with the place, light, background, or camera customization for your photos. Look at your images on the computer, they will differ from what you can see through the lens of the camera. Choose the best images from different angles to retouch them with the help of one of the special programs, like Adobe Lightroom, Photoshop, etc.
#7. Retouch photos
You can learn the basics of retouching photos via online lessons through the Internet, use special online services, or just use outsourcing to get ready pictures. It will be cheaper than a professional product photo session so you need it for your online store.
#8. Optimization images for online store
Search engine optimization will help your online store be more productive and effective. It applies not only for product descriptions but product images too. Your pictures should have high quality but at the same time be lightweight, for example, something about 200kb.
Every site offers its size of the place for product image, for example, it can be a square in 648px. If we download the picture in 1500px, we will get the square in 648px that opens with the speed of square in 1500px. A long time of page downloading is not what your site needs, so let’s consider how to solve this problem.
Find the size of the place for product images on your site
To get needed information you should use right-click on your site image and choose “Inspect element”. You will see the sidebar with the size of this place in pixels. You can make your images a little bigger than its size: it is a small trick to make them look good on the site.
Change the size of the picture
You can use one of the standard in-build tools, for example, Mac Preview or Microsoft Picture. Use right-click on your images and choose “Change” in the sidebar. Then export and save your new pictures in JPEG.
Compress the picture
You should be careful doing this: when we compressing the picture we remove extra data. If we compress it too much, we can get the worth quality of the image. It would be better if you will use programs that allow you to use the preview before saving the picture. It can be Photoshop or online smart services.
We hope our tips will help you to create perfect DIY photos for your online store. There is nothing impossible even you will make your first try just with a smartphone.


